Thursday, April 25, 2013

Locked In!

April 24 - Very short one this time.  We received a letter from Ryan Homes yesterday that outlined some of the upcoming events and how to get prepared.  It covered how to the contact the HOA, the utility companies, etc.  Yes, yes, all of the paperwork.  We know, very important.

Thumbs up on the good news.
It also noted some things about closing including bringing a certified check for the amount needed.  Well, that one took us aback momentarily because we did not think we needed to bring anything to closing because we were receiving a refund from Ryan Homes for our Good Faith payment.

Well, worry not, loyal readers.  We were correct according to our loan officer, Gary.  There was no need to bring a certified check because Ryan Homes would be paying us.  Money in the bank!

Money in the hand is money in the house.
However, the most important note on the paper was a projected closing date of June 7!  Woohooo!  Well, that woo-hoo lasted for a little while until our pre-drywall meeting where our project manager, Drew, noted that the gas company was two weeks behind and we would be delaying that order!  Bummer.


Lastly, we locked in our rate!  Bonus!  We debated on whether to pay a little to bring down the points and we chose to do so in the end.  It was the smarter play for the long term.  We get less money back at closing, but we save more in the long run.  Also, the monthly payments will be lower.  Still a great deal.  So, we locked in at 2.75% on a 30-year fixed loan.  So, we are really happy!  It will not be too much longer until we are in our new home!
This is how we all felt after we locked in our awesome rate!
Up next - a visit from our nephew on Saturday and taking him to see the homestead.  Until then, wherever you are keep on rockin' and be excellent to each other.


Pre-Drywall Meeting - Finished!

April 24 - We had our pre-drywall meeting today and it went really, really well.  We came prepared with our list of questions and ready to do our best Sherlock Holmes impression without the abs and the Iron Man duality.


All of the items that were already marked with orange paint had been fixed.  We were pleased to see that some of the items that had not been marked were fixed as well.  Perhaps, Drew noticed them or he reads our blog.  Cool beans either way.

A few things of note:

First, the house is covered with orange foam stuff.  While our son loved playing with it, we were questioning why it was hanging down and looking like radioactive hair mousse.  Well, the answer to that is that it is for fire protection and sealing between floors.  So, the little orange goo is there to protect you.  (Tag line trademarked by us).

Our son was so impressed with it.
Second, there will be insulation above the garage to keep the bedrooms and closet warm.  Toasty warm and without the smell of exhaust.

Third, all of the holes and gaps between the joints were filled and closed up.  There were no areas where drafts would be coming through.  No David Letterman teeth on this house!

All gaps were filled in.
Fourth, the leak around the fireplace was due to the horrendous storm that we had the night before.  Apparently, the flashing around the fireplace was not properly taped and the sideways rain ripped it off.  It has since been repaired.

Fifth, all outlets and lights are in proper position.  It is cool that they place one outlet upside down in each room to show which outlet works by the switch.  So, we get upside down o-faces in each room.

Sixth, all bathtubs were filled with water for the plumbing inspection.  There was one leak that was found in the basement and it has since been repaired.  Incidentally, there was also water under the furnace in the basement which was from the plumbing test as well.

The leaky pipe above has been repaired.
Must have been a heck of a leak!
Floor to ceiling!
This is the water that leaked from the pipe test (pipe is hidden behind post here).
Seventh, we were pleased to learn that the wall above our fireplace does not need more support for the television.  It is a load bearing wall that will support basically any sized television without issue.

Eighth, the tears in the attic area will all be closed.  There will be ventilation in the attic that will allow for airflow.

Ninth, the crushed duct work.  Well, crushed is a strong word.  Let's go for squished!  The duct had been bent because there are water pipes right above it and it needs to fit inside of the ceiling.  The duct is not completely crushed so the air flow should not be disrupted.

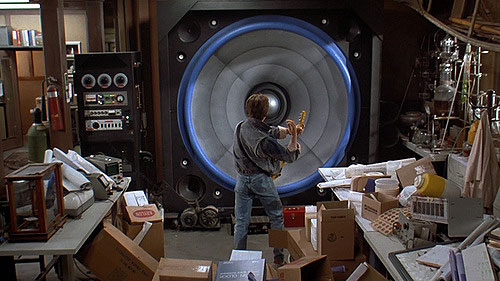
Tenth, the speaker boxes were installed as were the rough-ins for the sconce lighting.  Beauty, mate.  Now, Bryan can have the speaker system that he has always dreamed about.

This one definitely goes to 11.
We also took a look outside the house to note where the water bibs and outlets were located.  We also looked at the roof, the house wrap, and the flashing on the windows.  All is in working order.

We were very pleased with our walk-through and Drew, our project manager, was extremely patient with all of our questions and our son's questions too.  Who knew a four year old would have so many questions about how a home was built?  Drew even took us down to the model to see the progress inside and to take a look at what our interior doors will look like.  It was so much fun!

There were two things that we are very, very happy about!  We get a mailbox!  This may not seem like a major deal to anyone else, but we are kind of tired of the community mailbox.  While Bryan certainly needs the exercise (yes, he's a little tubby you can admit it), the community mailbox at our rental is riddled with neighborhood advertisements and missing cat flyers, as well as, graffiti.   Awesome.  So, we were quite happy to learn that we would be getting our very own mailbox again.

We can only dream that it would be as wicked awesome as this.
The second cool thing is that our house will be used in a demonstration for potential buyers on Saturday.  They are going to conduct a duct blasting test that will measure to see the airtight quality of the duct work for the heating and cooling system.  It is going to be looking at the airflow to make sure that it measures correctly.  This gave us a big boost because we know that they are going to make every effort to make sure that test goes well for the demonstration.  So, that means it will be good for us!

Oh, my gosh! That giant slinky has come to kill us!
One more note, we know it is getting too long at this point.  We remain very impressed with Drew and his attention to detail.  He noted areas that still needed repair and talked about all of the areas that were fixed.  He remains to be honest and always communicative.  We could not ask for a better project manager and that's the truth, Ruth.

SLJ knows it.

Wednesday, April 24, 2013

Pre-Drywall Meeting Questions

April 23 - The day finally arrived for our pre-drywall meeting and Bryan was very nervous.  As we were not clear what our loan rate would be, how much we would need to bring to closing, or any other hidden fees that were coming along we had to elect to not have a professional inspection during the pre-drywall stage.  However, we tried to educate ourselves as much as possible on what to look for during this meeting.  Well, that was easier said than done!  We quickly realized that we were waaaaaaaaay out of our league...like Mighty Ducks out of their league before they got Emilo as their coach and won the championship as one of the more "believable" Cinderella stories.  (By the way, The Mighty Ducks is 21 years old this year.  Who feels old now?)

EMILIO!!!!!  Quack...quack....quack...quack
As we know how difficult it was for us to find these questions/lists of items to look for, we thought we would share them with you.  By no means would we say that this is a definitive list, but it was a good start:

  1. Confirm that all electrical outlets, HVAC, light boxes, and plumbing has been installed according the specifications and has passed inspection with local code enforcement.
  2. Make sure that all penetrations and door/window openings are sealed with expanding foam to prevent air infiltration.
  3. Test for leaks in all show pans, tubs, and drain lines by filling them with water and allowing them to stand for at least 24 hours.
  4. Double-check the wood blocking for future placement of grab bars, bath accessories, paintings, wall-mounted televisions, and other similar items.
  5. Test new HVAC systems for leaks with a duct blaster test.
  6. Take photos of exposed walls and ceilings for future reference.
  7. Make sure the can lights are locked down to the rails; make sure that it does not move.
  8. Conduct a manual J calculation to determine the heat load and the cooling load for the house.
  9. Lighting and reciprocal to be near the HVAC unit.
  10. Nothing combustible within one inch of the flu pipe off of HVAC unit.
  11. Will Energy Star be conducting a Thermal Bypass Check?
  12. Will there be a keyless light in the attic?
  13. Make sure the kitchen island is drawn on the floor to be certain the electrical outlets and lights are in the correct and convenient places.
  14. Check for the exterior lights on front, back, and garage.
  15. Check for exterior outlets and water bibs.
  16. Check for locations of outlets, thermostats, and fixtures to make sure they are in their proper place.
  17. Look for walls that are not square.
  18. Ask about noise level for flushing pipes from the second floor.
  19. Ask about insulation for garage ceiling for bedrooms and space above garage.
  20. Make sure all floors are not squeaky as this could be more of an issue with the wall than the floor.
  21. Look for missing outlets, cable plugs, etc.
  22. Bring your spec sheet and upgrade sheets and double check you have gotten everything that was ordered.
  23. Check if HVAC tubes in the attic are straight as every sharp turn decreases pressure.
  24. Take a picture of each wall in each room from multiple angles if possible.
  25. Check if the house is built according to plan (ask the Project Manager to bring the blueprints).
  26. Check on the pace where you plan on adding items such as a shower rack, shelf and see if these need to be added.
  27. Make note of any plumbing draining clean-outs.
  28. Take a picture of every electrical and cable box.
  29. Do check the insulation (if already installed) for squished edges, holes, gaps, etc.
  30. Make sure the insulation does not overlap onto the wall side of the studs.
  31. Check that joints in heat ducts are taped properly.
  32. Bring a measuring tape to check the measurements.
  33. Bring a level and check floors, stair treads, etc.
  34. Check for holes in the exterior walls.
  35. Check that doors swing correctly and make sure light switches are not behind doors.
  36. Check blocking for hanging items such as TP holders, towel racks, shelving, and cabinets.
  37. Check for nail clips in front of power cords and water/drain lines.
  38. Check for draft stop/fire blocking between floors.
  39. Check for truss clips.
  40. Make sure that all overhead light fixture boxes are properly blocked - remember, they may be supporting heavy ceiling fans and there will need to be support for them.
  41. Check for defective installation in the roof including over-driven nails, nails driven at an angle, short nails, or located too high on the shingles.
  42. Check to be sure that deck beams are attached with metal brackets to a 6 X 6 post.
  43. Check for improper joist hanger nails or short nails.  
  44. Check for masonry veneer defects - masonry veneer needs to be 2" above the roof covering.
  45. Check that the high efficiency furnace and water heaters have the venting pitched so that water drains out.
  46. Check that the joints for the vents from the water heater are properly glued and installed.
  47. Check for all air registers and document them as carpet installers may cover the vents.
  48. Check for gaps in the duct work and for crushed duct work as this reduces air flow.
  49. Check the air conditioning unit (if installed) to make sure it has not tipped while settling as it will place stress on the refrigerant lines.
  50. Check all flashing on the windows to be sure they are properly taped and secured.
  51. Check all CSST gas lines to be sure they are properly bonded to reduce risk of fire from lightning strikes.
  52. Check to make sure that smoke detectors are in their proper locations; if they are wall-mounted then they need to be at least 4" down from the ceiling.
  53. Check floor joists to be sure that the plumbing has not taken chunks out.
  54. Check for load points in the family room and other high traffic areas.
  55. Check for additional cross members under the laundry room (if on second floor) to lessen vibration.
  56. Check rafters to make sure they are attached to the walls.
  57. Check attic access point to be sure it is where it needs to be/you want it.
  58. Check for holes in the peaks of the roof.
  59. Check for damage on doors.
  60. Check for placement of Guardian keypads (if selected).
  61. Check for proper toilet placement and rough ins.
  62. Check for tears in exterior house wrap.
  63. Check for wires that are touching metal brackets.
  64. Check for microwave outlet and exterior exhaust.
  65. Check to make sure sliding glass and exterior doors close and latch properly.
Much of this will be checked by the county inspector, but this person is often looking to make sure it is meeting code.  This may not mean that it is always done properly.  We hope this list helps and we thank all of the bloggers and the various websites that have helped us to be able to compile this list.